How to Craft One-of-a-Kind Notebooks with Custom Iron Patches?
If you’ve ever stared at a pile of pretty iron patches and a blank notebook cover and thought, I have no idea where to start, you’re not alone. Personalizing journals should feel fun and expressive, yet the decisions, Which custom patch? What layout? Will heat ruin the pages?, stack up fast.
This guide is your friendly shortcut. We’ll name the biggest sources of confusion, explain why they derail people, and give you clear, repeatable moves to get from idea to finished, durable, beautiful notebook. You’ve got this.
1) “Will custom iron patches patches even stick to my notebook?” — Material Mismatch
Why it’s confusing:
Notebooks come in every surface imaginable: fabric, paper-wrapped board, faux leather (PU), real leather, plastics, even coated card. Most iron-on adhesives are designed for porous, heat-tolerant textiles. If you heat a vinyl cover, it can ripple or melt; if you press onto slick plastic, the adhesive won’t bond; if you press onto paper without protection, it can warp.
Impact:
Custom embroidered patches pop off, covers blister, pages wrinkle. Confidence tanks.
The clear solution: Choose the right surface, or create one.
Step-by-step:
- Identify the cover.
- Safe to iron directly: cotton canvas, denim, linen-wrapped boards.
- Use caution / alternatives: paper-wrapped boards, faux leather (PU), plastic, glossy card.
- Safe to iron directly: cotton canvas, denim, linen-wrapped boards.
- If your cover isn’t iron-friendly, add a slipcover:
- Wrap the notebook in a fabric book sleeve (store-bought or DIY from cotton canvas).
- Iron patches onto the sleeve off the notebook, then slip it on, zero risk to pages.
- Wrap the notebook in a fabric book sleeve (store-bought or DIY from cotton canvas).
- For non-fabric covers you love:
- Use fabric glue (flexible, dries clear) to attach the custom iron-on patch instead of heat.
- Or use heat-activated film (double-sided fusible web) to bond the custom patch to a thin fabric square, then glue that square to the cover for a layered look.
- Use fabric glue (flexible, dries clear) to attach the custom iron-on patch instead of heat.
Pro tip: Always test on a spare card/fabric scrap with the same adhesive and heat before committing.
2) “There are too many iron patches—how do I choose?” — Design Decision Overload
Why it’s confusing:
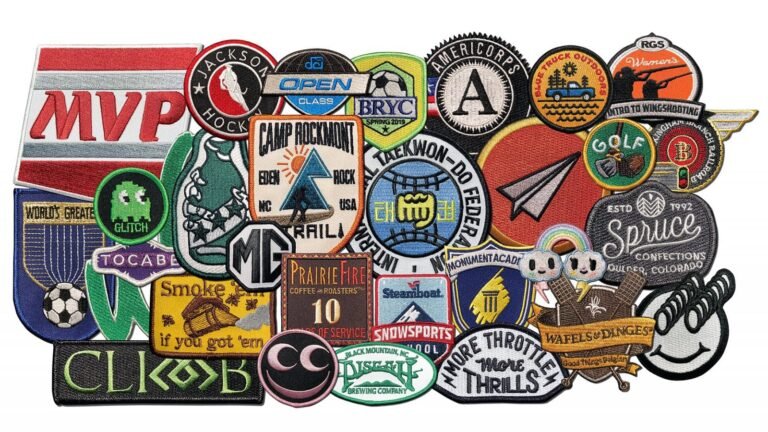
Themes, sizes, colors, textures (embroidered, chenille, woven, printed), it’s a candy store of options. Without a simple framework, you can end up with a busy collage that reads “random” instead of “intentional.”
Impact:
Analysis paralysis or designs you fall out of love with in a week.
The clear solution: Pick a mini-system and stick to it.
Step-by-step:
- Choose a micro-theme (one sentence):
“Travel + blue tones,” “Botanical + gold accents,” or “Daily mantra + minimal.” - Apply the ‘3-2-1 formula’:
- 3 small accent patches (icons, stars, leaves)
- 2 medium patches (supporting visuals)
- 1 focal patch (title, emblem, or word)
- 3 small accent patches (icons, stars, leaves)
- Use a simple layout rule:
- Grid (aligned edges for a tidy, editorial look)
- Diagonal arc (energy and movement)
- Rule of thirds (center of interest not dead center)
- Grid (aligned edges for a tidy, editorial look)
- Mock it up without commitment:
- Cut paper placeholders the size of your custom iron patches.
- Arrange on the cover, take a phone photo, adjust, re-photo.
- Decide once you love how it looks in the photo, that’s how your eye will read it daily.
- Cut paper placeholders the size of your custom iron patches.
Pro tip: Limit your palette to 2–3 colors plus one metallic or neutral to keep cohesion.
3) “Won’t heat ruin my pages?” — Heat & Paper Anxiety
Why it’s confusing:
You’ve got a hot iron, adhesive that can bleed, and a stack of paper millimeters away. It’s a reasonable fear.
Impact:
People avoid starting or scorch the cover and swear off patches forever.
The clear solution: Control temperature, time, and pressure, and isolate the pages.
Step-by-step (iron-safe covers only):
- Prepare the notebook:
- Slide a piece of cardboard or a thin ceramic tile inside the front cover to create a rigid, heat-safe base and block heat from transferring to pages.
- Place a pressing cloth (cotton scrap or baking parchment) over the custom embroidered patch to prevent shiny marks.
- Slide a piece of cardboard or a thin ceramic tile inside the front cover to create a rigid, heat-safe base and block heat from transferring to pages.
- Set your heat:
- Start at medium (wool setting ~150–160°C); adhesives generally activate around here.
- Avoid steam.
- Start at medium (wool setting ~150–160°C); adhesives generally activate around here.
- Press, don’t iron:
- Hold steady pressure for 10–15 seconds, lift, check a corner. Repeat in short bursts until bonded.
- Press from the front, then flip the cover and press lightly from the back if the surface allows (fabric only).
- Hold steady pressure for 10–15 seconds, lift, check a corner. Repeat in short bursts until bonded.
- Cool under weight:
- Let it cool flat under a book for 5–10 minutes to lock the bond.
- Let it cool flat under a book for 5–10 minutes to lock the bond.
If you’re still nervous: Use a mini craft iron or heat press for better control, or skip heat and use a quality fabric glue.
4) “Will it last?” — Durability Doubts
Why it’s confusing:
Notebooks live in backpacks, rub against other books, and flex at the spine. A pretty custom patch is no good if it peels at the edges in a week.
Impact:
Frustration, wasted materials, and a project that doesn’t survive real life.
The clear solution: Reinforce edges and choose the right adhesive for the job.
Step-by-step:
- Pick the right adhesive path:
- Iron-on to fabric slipcover: strongest and cleanest.
- Fabric glue to hard/slick cover: pick a flexible, clear-drying brand; avoid brittle craft glues.
- Iron-on to fabric slipcover: strongest and cleanest.
- Seal the edges:
- Run a thin bead of fabric glue around the embroidered patch border with a toothpick; wipe excess for a neat finish.
- Optional: topstitch by hand through a fabric slipcover using an awl and heavy thread for a stitched-on look (don’t stitch into paper boards).
- Run a thin bead of fabric glue around the embroidered patch border with a toothpick; wipe excess for a neat finish.
- Mind the high-wear zones:
- Keep bulky chenille patches away from the spine and corners where friction is highest.
- Place focal patches slightly inset from edges to avoid peeling.
- Keep bulky chenille patches away from the spine and corners where friction is highest.
Care tip: If a corner lifts later, warm it gently (or add a dot of glue), press, cool under weight, good as new.
5) “What if I mess it up?” — Perfectionism & Fear of Commitment
Why it’s confusing:
A permanent adhesive plus a visible cover is a scary combo, especially for a first attempt.
Impact:
You postpone indefinitely or clutter the cover with “safe” tiny patches that don’t add up to a story.
The clear solution: Start removable, iterate fast, then commit.
Step-by-step:
- Begin with a ‘trial patch’:
- Use hook-and-loop dots (Velcro®) or removable double-sided tape to audition placement for a day or two.
- Use hook-and-loop dots (Velcro®) or removable double-sided tape to audition placement for a day or two.
- Try a belly band:
- Add patches to a removable fabric or elastic band that slides over the notebook. It’s a stylish training wheels phase.
- Add patches to a removable fabric or elastic band that slides over the notebook. It’s a stylish training wheels phase.
- Adopt the 24-hour rule:
- Live with your mockup for a day. If you still love it tomorrow, then heat-set or glue permanently.
- Live with your mockup for a day. If you still love it tomorrow, then heat-set or glue permanently.
Mindset shift: Your first notebook is a prototype, not a museum piece. Every journal you customize will get better.
A 10-Minute “Clarity First” Recipe
When you want quick wins without the spiral:
- Pick a fabric slipcover (or wrap your notebook in cotton canvas).
- Choose the 3-2-1 set: one focal, two medium, three small accents.
- Lay them on a diagonal arc, snap a photo, tweak once.
- Press focal patch first (10–15 sec), then mediums, then accents.
- Seal edges lightly, cool under a heavy book. Done.
Real-World Examples to Steal
- Mindset Journal: Canvas slipcover, one embroidered word (“Focus”) centered at upper third; two line-art leaf patches near the fore-edge; three mini stars clustered near the lower corner. Calm palette (sage, cream, gold). Minimal, giftable, durable.
- Travel Log: Denim slipcover, country flag mini-patches aligned as a grid; empty spaces left for future trips (built-in motivation). Title patch on spine for shelf recognition.
- Class Notebook: Faux-leather cover (no heat). One woven mascot patch glued, plus two thin ribbon “tabs” glued underneath as page markers, minimal heat, maximum function.
Expert Micro-Tips That Save Headaches
- Check patch type: Embroidered patches bond and wear best; chenille is thick (great for slipcovers, not great on tight backpacks). Woven patches keep fine detail small.
- Pressing cloth always: It prevents shine and scorching. Baking parchment works in a pinch.
- Work off the notebook when possible: Bond patches to a slipcover flat on your table, then slide it on, cleaner and safer 100% of the time.
- Document your layout: Keep the phone photo; if you ever need to recreate or gift it, you’ve got the recipe.
- Embrace negative space: Blank areas are breathing room, not missed opportunities.
Summing Up
Personalizing journals with iron-on patches doesn’t require bravery so much as a simple plan: pick a surface that plays nice, design with a small framework, protect the pages, reinforce the edges, and give yourself permission to iterate. Overwhelm fades when decisions become steps.
Start small today: choose one notebook, one focal patch, and two accents. Mock it up, sleep on it, then commit. With each finished cover, your style sharpens and your confidence compounds. Simplicity isn’t boring; it’s the fastest route to a notebook that tells your story and survives your backpack.
You don’t need perfect. You need to be done, and you’re closer than you think.


