Iron Patches for DIY Festival and Concert Outfits
Iron patches are your secret weapon for giving DIY festival and concert outfits a personal touch. They're easy to apply and come in a variety of designs that reflect your style. Start by choosing patches that resonate with you, whether they're vibrant, punk, or bohemian. Make sure to properly prepare your fabric for the best adhesion, then use an iron to secure your patches in place. Keep them looking sharp with gentle washing and proper storage. With endless customizations possible, your outfits can truly stand out. Stick around to uncover expert tips and ideas for leveling up your festival wardrobe.
Key Takeaways
- Iron patches provide a quick way to personalize festival outfits, showcasing unique designs that reflect your style.
- Choose patches that align with your festival themes for cohesive and eye-catching outfits.
- Ensure proper fabric preparation and patch placement for a secure and durable application.
- Care for patches by washing in cold water and air drying to maintain their appearance and integrity.
- Explore various purchasing options like online retailers, local craft stores, and thrift shops for unique iron patches.
Benefits of Using Iron Patches
When you choose to use iron patches for your DIY outfits, you're not just adding a unique flair; you're also reaping a variety of practical benefits.
First off, these patches serve as fantastic creative expressions, allowing you to showcase your personality and style. Whether you're attending a festival or a concert, they let you customize your clothing in ways that reflect your individual vibe.
Iron patches are incredibly easy to apply, saving you time and effort while enhancing your wardrobe. Just heat them with an iron for a few seconds, and voilà—your outfit transforms instantly!
They also provide a durable solution for covering up wear and tear, ensuring your favorite garments stay in top shape.
Moreover, iron patches can tie your outfit together, especially when you're looking to align with specific festival themes.
Picture yourself rocking a bohemian look with colorful patches or embracing a punk aesthetic with edgy designs. The possibilities are endless, and every patch tells a story.
Choosing the Right Patch
Finding the right patch for your DIY outfit can elevate your style and make a statement. Start by considering the patch materials. Iron-on patches typically come in fabric, PVC, or embroidered finishes. Each material offers a different aesthetic, so think about what suits your vibe best.
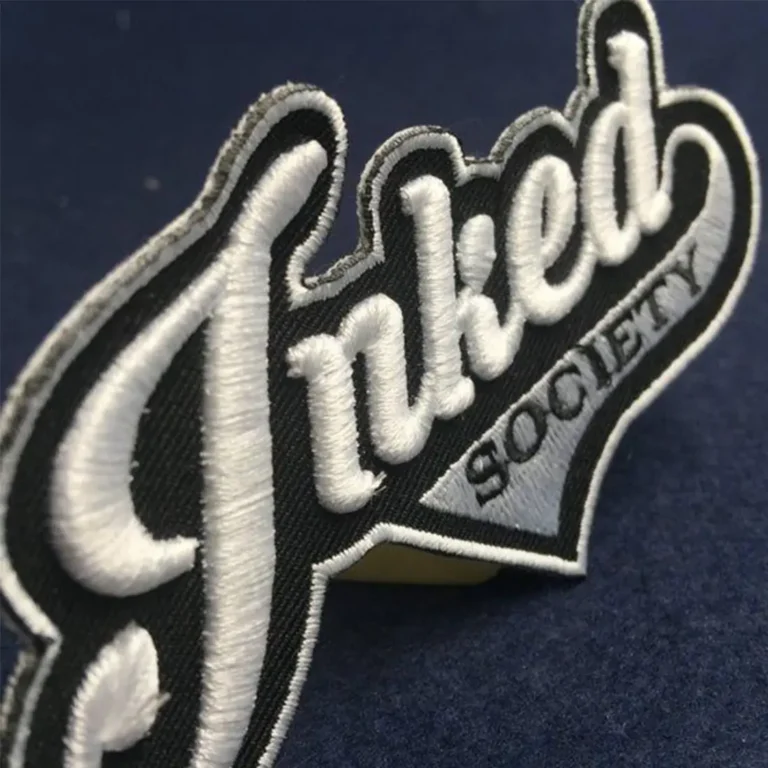
For a vintage look, embroidered patches might be your go-to. If you want something edgy, consider PVC patches, which often have a shiny, modern appearance.
Next, draw on design inspiration. Look at your favorite bands, artists, or even nature for ideas. Think about colors and themes that resonate with you. Are you drawn to bold graphics or subtle designs? The right patch should reflect your personality and enhance your outfit.
Don't forget about the size and placement of the patch. A larger patch can become a focal point, while smaller ones can be grouped together for a unique collage effect.
Whether you're going for a rocker look or something more whimsical, the right patch can tie your entire outfit together. So, take your time and choose a patch that truly represents you!
Preparing Your Fabric
Prepping your fabric is essential for a successful patch application. Start by choosing the right fabric types for your project. Cotton, denim, and canvas work best with iron-on patches, as they can withstand the heat needed for adhesion.
If you're using a more delicate fabric, like silk or polyester, consider using a different attachment method to avoid damage.
Once you've selected your fabric, wash and dry it to remove any dirt or chemicals. This step guarantees the patch adheres properly.
Before applying your patch, identify the best patch placement. Lay your fabric flat and position the patch where you want it, ensuring it's centered and straight. Use fabric chalk or a pencil to mark the area lightly, so you know exactly where to place it.
If your fabric has any wrinkles, press it with an iron on a low setting to smooth it out. This creates an ideal surface for the patch.
Application Techniques
Application techniques play an essential role in ensuring your iron patches adhere securely to your fabric. First, gather your application tools: an iron, a pressing cloth, and a flat, heat-resistant surface.
Start by preheating your iron to the appropriate temperature, usually the cotton setting, but check the patch's instructions for specifics.
Next, decide on your patch placement. Consider the design of your outfit and where the patch will have the most impact. Once you're happy with the location, lay the patch on the fabric, ensuring it's flat and smooth.
Place the pressing cloth over the patch to protect both the patch and the fabric from direct heat.
Now, press the iron firmly onto the patch for about 10-15 seconds, applying even pressure. Avoid sliding the iron back and forth, as this can cause the patch to shift.
After pressing, let it cool for a few minutes before lifting the pressing cloth. For added security, you can repeat the process on the reverse side of the fabric.
Following these steps will help you achieve a durable bond that keeps your patches in place, adding flair to your outfits!
Styling Ideas for Outfits
When you're looking to elevate your outfits, incorporating iron patches can add a unique and personal touch. Start by choosing patches that complement your style and the colors in your wardrobe. Consider bold color combinations—like pairing a vibrant patch with a neutral base. This contrast draws attention and makes your outfit pop.
Layering techniques can also enhance your look. For instance, wear a denim jacket adorned with patches over a graphic tee. This adds depth and visual interest. You might even try layering a lightweight oversized shirt over a fitted top, showcasing patches on both layers.
Don't shy away from mixing different textures, either. Combining denim, cotton, and leather can create a dynamic outfit. If you're feeling adventurous, try contrasting patch styles—like a punk rock patch paired with a floral one.
Lastly, think about strategic placement. Position patches on pockets, sleeves, or the back of your jacket to create focal points.
With a little creativity, you'll transform your outfits into eye-catching ensembles that reflect your personality and sense of style.
Customizing Your Patches
As you immerse yourself in customizing your patches, consider how you can make them truly yours. Start with your patch design; think about what resonates with your personality and style. Whether it's a bold graphic, a quirky slogan, or a tribute to your favorite band, the design should reflect your identity.
Next, pay attention to fabric compatibility. Different patches work better with specific fabrics, so choose wisely. For instance, denim is perfect for embroidered patches, while canvas can complement printed designs. Confirm your patches are made from durable materials that can withstand the festival vibe.
Don't hesitate to mix and match different patch styles and sizes to create a unique look. You might layer smaller patches over larger ones or place them asymmetrically for an edgy feel. Additionally, consider adding embellishments like studs or beads to elevate your design.
Finally, think about the colors you choose. A cohesive color palette can tie your outfit together, while contrasting colors can make your patches pop. Embrace your creativity, and remember, the goal is to express yourself through your one-of-a-kind patches!
Care and Maintenance Tips
To keep your iron patches looking their best, you'll want to follow some simple care and maintenance tips.
Start by learning the right washing and drying methods, and consider how you store your outfits to prevent damage.
If a patch becomes damaged, knowing how to repair it can save your favorite DIY creation.
Washing and Drying Tips
Caring for your DIY outfits with iron patches involves proper washing and drying techniques to guarantee they stay vibrant and secure. To confirm both fabric care and patch longevity, follow these essential tips:
Washing Tips | Drying Tips |
---|---|
Always wash in cold water. | Air dry your outfit flat. |
Turn the garment inside out. | Avoid direct sunlight. |
Use a gentle detergent. | Don't use a tumble dryer. |
Avoid bleach or harsh chemicals. | If using a dryer, use low heat. |
Wash with similar colors. | Remove promptly to prevent wrinkles. |
Washing your outfit in cold water helps prevent fading and keeps patches intact. Turning your garment inside out protects the patches from friction during the wash cycle. When it comes to drying, air drying is the safest option to maintain patch integrity. If you must use a dryer, keep the heat low and remove your outfit promptly to avoid creasing. By following these tips, you'll confirm that your DIY outfits with iron patches remain as eye-catching as the day you created them!
Storage Recommendations
When it comes to storing your DIY outfits with iron patches, keeping them in ideal condition is essential for their longevity. Start by ensuring your garments are clean and completely dry before storage, as moisture can lead to mildew.
For effective patch organization, consider using garment bags or breathable fabric storage bins. These options protect your outfits from dust and light while allowing air circulation.
Avoid folding your outfits with patches in a way that puts pressure on the designs. Instead, hang them on padded hangers to maintain their shape and prevent any creases. If you need to store your outfits long-term, use acid-free tissue paper to separate layers, minimizing friction between the patches.
Moreover, keep your storage area cool and dry, as extreme temperatures can damage both fabric and adhesive. If you have multiple outfits, clear plastic bins can be a great storage solution. Label each bin for easy access and avoid rummaging through them, which can cause wear.
Repairing Damaged Patches
Damaged patches on your DIY outfits can detract from their overall look, but with a little effort, you can restore them to their former glory. First, assess the damage. If the edges are fraying, use fabric glue to secure them back in place. For larger tears, consider adding a complementary patch over the damaged area. This not only enhances patch longevity but also gives your outfit a unique flair.
Next, always check for fabric compatibility when applying repairs. If your patch is made of denim, it's best to use a similar weight fabric for any fixes. This guarantees that the patches adhere properly and maintain their durability.
After making repairs, take care of your patches by washing your outfit inside out, which helps prevent further wear. If possible, air dry your clothes to minimize heat exposure, which can weaken the adhesive over time.
Lastly, consider reapplying a thin layer of fabric glue around the edges of your patches every few months. This simple maintenance step can greatly prolong their lifespan, keeping your DIY festival and concert outfits looking fresh and vibrant.
Where to Buy Iron Patches
For those looking to add a personal touch to their outfits, finding the right iron patches is essential. You've got a couple of great options to explore.
First, check out online retailers. Websites like Etsy and Amazon offer a wide variety of patches in all shapes, sizes, and themes. You can easily browse and compare styles from the comfort of your home, making it a convenient option for busy schedules.
If you prefer a hands-on approach, local craft stores are another fantastic choice. Stores like Michaels or Joann often carry a selection of iron-on patches, allowing you to see the colors and textures in person. Plus, you can get inspired by other DIY materials while you're there.
Don't forget to explore thrift shops or vintage stores, too! Sometimes you can find unique patches that add a one-of-a-kind flair to your outfit.
No matter where you choose to shop, take your time to select patches that resonate with your personal style, ensuring your DIY festival or concert outfit stands out. With the right patches, you'll create something truly special!
Frequently Asked Questions
Can Iron Patches Be Removed Easily Without Damaging Fabric?
Yes, you can remove iron patches easily if you use proper removal techniques. Just verify your fabric's compatible with heat; applying steam can help loosen the adhesive without damaging the material. Always test a small area first.
Are Iron Patches Waterproof or Water-Resistant?
You've got the right idea—iron patches aren't entirely waterproof, but their water-resistant nature helps with light splashes. For ideal iron patch durability and maintenance, avoid soaking and dry them carefully after washing.
Can I Use Iron Patches on Leather or Denim?
You can use iron patches on leather or denim, but adjust your application techniques. Make certain the fabric can withstand heat, and choose patch designs that complement your style for the best results.
How Long Do Iron Patches Typically Last on Clothing?
Iron patches typically last several washes, but their longevity depends on application techniques and fabric care. By following proper instructions and avoiding harsh treatments, you can extend their lifespan on your clothing considerably.
Are There Age Restrictions for Using Iron Patches?
You might wonder if age limits exist for using iron patches. While application techniques vary, there aren't strict restrictions. Whether you choose fun designs or classic styles, anyone can enjoy personalizing their clothing with patches!
Conclusion
Incorporating iron patches into your festival and concert outfits can elevate your style like a cherry on top of a sundae. They're not just a fun way to express yourself; they're a simple DIY solution that adds personality to your wardrobe. With the right patches and a little creativity, you can turn heads and stand out in any crowd. So gather your inspiration, get your patches, and let your unique style shine at your next event!