How to Remove Iron on Patches
When it comes to removing iron-on patches, knowing the right technique is key to achieving a clean result. You might have encountered challenges in the past, but fear not, as there are effective methods to tackle this task. By following a few simple steps, you can bid farewell to those unwanted patches and restore your garment to its former glory. So, let’s delve into the process and uncover the secrets to successful patch removal.
Key Takeaways
- Use a seam ripper to cut threads securing the patch.
- Place a cloth over the patch to protect the fabric.
- Apply heat with an iron set on cotton setting.
- Gently peel off the patch after cooling.
- Remove adhesive residue with mild remover or warm water.
Gather Necessary Tools
To begin the process of removing iron-on patches, you’ll need a few essential tools. Firstly, grab a seam ripper.
This tool will help you carefully cut the threads that secure the patch to the fabric. Be cautious not to damage the surrounding fabric while using the seam ripper.
Next, get a thin, clean cloth or a pressing cloth. This will act as a protective barrier between the iron and the patch during the removal process, preventing any adhesive from sticking to the iron.
Additionally, a pair of tweezers will be beneficial for pulling out any remaining threads or small pieces of the patch left behind.
You will also need an iron for this process. Make sure the iron doesn’t have any water in it and that it’s set to the appropriate temperature for the fabric of the garment.
Lastly, have some vinegar or rubbing alcohol on hand. These substances can help dissolve any stubborn adhesive residue left on the fabric after the patch is removed.
Preheat the Iron
Before proceeding with the removal of the iron-on patch, ensure that your iron is preheated to the appropriate temperature for the fabric.
This step is crucial in effectively loosening the adhesive of the patch, making it easier to remove without causing damage to the fabric underneath.
To preheat the iron, plug it in and set it to the temperature recommended for the specific fabric the patch is attached to.
Consult the care label on the garment for guidance on the appropriate heat setting. Typically, lower heat settings are suitable for delicate fabrics like silk or synthetics, while higher heat settings are required for cotton or denim.
Allow the iron to fully heat up before proceeding. It’s important to ensure that the iron reaches the desired temperature to effectively loosen the adhesive backing of the patch.
Waiting a few minutes for the iron to reach the right heat level can make a significant difference in the ease of patch removal.
Once the iron is preheated, you’re ready to move on to the next step of placing a cloth over the patch.
This protective barrier will prevent direct contact between the iron and the patch, reducing the risk of damaging the fabric or the iron-on patch during the removal process.
Place a Cloth Over the Patch
Lay a clean cotton cloth over the iron-on patch that you’re preparing to remove. This step is essential to protect both the patch and the fabric it’s attached to during the removal process.
The cloth acts as a barrier between the patch and the direct heat you’ll be applying shortly.
By placing the cloth over the patch, you minimize the risk of damaging the fabric underneath or causing the adhesive to melt and spread.
Ensure that the cloth completely covers the iron-on patch, extending beyond its edges to shield the surrounding fabric.
A cotton cloth is recommended as it can withstand the heat from the iron without melting or sticking to the patch.
The cloth should be clean to prevent any dirt or debris from transferring onto the patch or fabric.
Press down gently on the cloth to secure it in place before moving on to the next step. This simple preparation step can make a significant difference in the success of removing the iron-on patch effectively and without causing any harm to the garment.
With the cloth in position, you’re now ready to proceed to the next stage of applying heat to loosen the adhesive and lift off the patch.
Apply Heat to the Patch
With the cloth securely in place over the iron-on patch, the next step involves applying heat to effectively remove the patch.
Applying heat is crucial as it helps weaken the adhesive that binds the patch to the fabric. Here’s a simple guide to applying heat to remove iron-on patches:
| Method | Description |
|---|---|
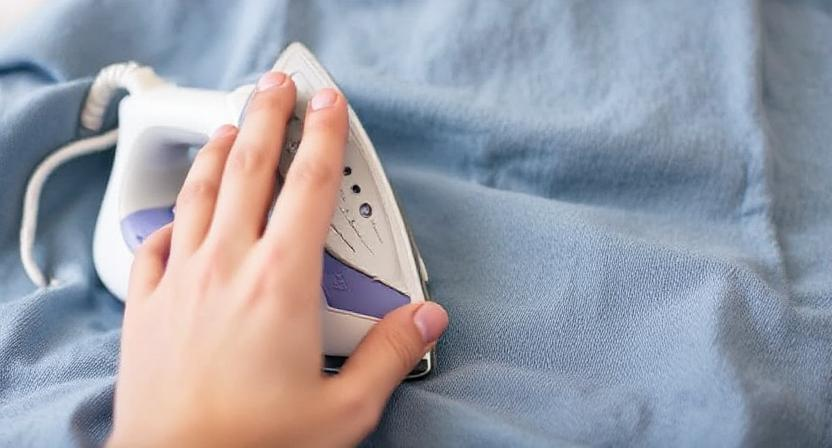
| Iron Setting | Set your iron to the cotton setting without steam. Make sure to avoid using the steam function. |
| Pressing Time | Press the iron firmly on the cloth-covered patch for about 15-20 seconds to heat up the adhesive. |
| Even Pressure | Apply even pressure while moving the iron in circular motions to ensure the heat is evenly spread. |
| Cooling Down | Allow the patch to cool down for a few minutes before proceeding to gently peel it off. |
Gently Peel off the Patch

Peeling off the iron-on patch should be done with care to avoid damaging the fabric underneath. After applying heat to the patch, it’s time to remove it gently.
Begin by allowing the fabric to cool down slightly before attempting to peel off the patch. This will prevent any accidental burns and make the removal process easier.
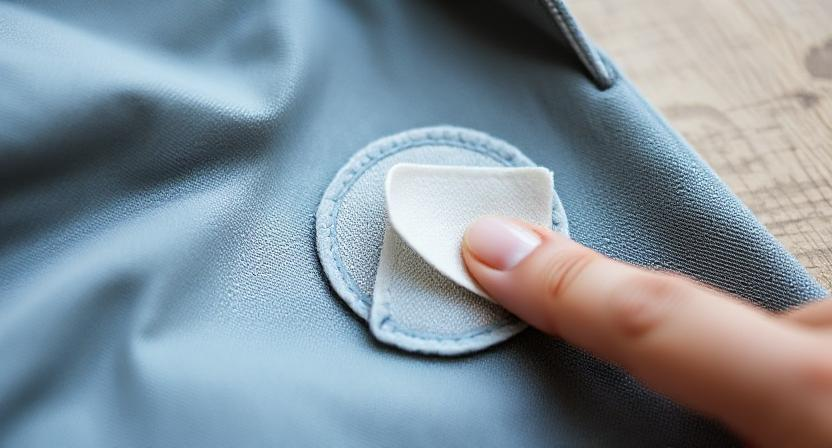
Start by lifting one corner of the patch with your fingertips. Slowly peel back the patch, ensuring that you’re not pulling too hard or too fast.
If you encounter resistance, stop and apply more heat to soften the adhesive further.
Continue peeling until the entire patch is removed from the fabric. Be cautious when peeling near delicate fabrics or intricate designs.
Use a gentle touch and take your time to avoid tearing or stretching the fabric.
If the patch seems to be sticking, stop and reapply heat as needed. Remember, patience is key to a successful removal process.
Once the patch is completely removed, inspect the fabric for any leftover adhesive residue. If there are any remnants, proceed to the next step to effectively clean the area and ensure a smooth finish.
Remove Adhesive Residue
To effectively eliminate any adhesive residue left behind after removing the iron-on patch, begin by gently rubbing the affected area with a clean cloth or paper towel. This initial step helps loosen the adhesive, making it easier to remove.
If rubbing alone doesn’t completely get rid of the residue, you can try using a mild adhesive remover. Apply a small amount of the adhesive remover to a clean cloth and gently dab at the residue.
Be cautious with the amount you use, as too much may damage the fabric.
Another method to tackle adhesive residue is using a mixture of warm water and mild detergent. Dampen a cloth with the solution and gently rub the affected area in a circular motion.
This can help break down the adhesive, making it easier to lift off the fabric.
Remember to rinse the garment thoroughly after using this method to ensure all detergent residues are removed.
For stubborn residue, you can also try using a hairdryer on a low heat setting. Point the dryer at the residue and gently heat it. This can help soften the adhesive, making it easier to wipe away.
Once you’ve removed the residue, proceed to wash and dry the garment as usual to ensure all traces of the adhesive are gone.
Wash and Dry the Garment
After successfully removing the adhesive residue, it’s essential to proceed with washing and drying the garment to ensure a thorough cleanup.
Washing the garment will help eliminate any remaining traces of adhesive or residue, leaving your clothing fresh and ready to wear again.
Follow these simple steps to wash and dry your garment effectively:
- Separate: Sort your garment according to color and fabric type to prevent any color bleeding or damage during the washing process.
- Pre-Treat Stains: Inspect the garment for any stains and pre-treat them using a suitable stain remover to ensure they’re fully removed.
- Select Water Temperature: Choose the appropriate water temperature for the fabric of your garment – hot water for whites and cold water for colors to prevent fading.
- Use Gentle Detergent: Opt for a mild detergent to protect the fabric and avoid harsh chemicals that may cause damage.
- Air Dry or Tumble Dry: Depending on the fabric, air dry the garment by hanging it up or tumble dry on low heat to prevent shrinking or damage.
Inspect for Any Remaining Residue
Check the garment thoroughly for any lingering residue after removing the iron-on patches. Inspecting for any remaining residue is crucial to ensure that the fabric is clean and ready for further use.
Begin by examining the area where the patch was located. Look for any adhesive or patch remnants that may still be stuck to the fabric.
Gently rub the fabric between your fingers to feel for any sticky residue. If you detect any remaining adhesive, you can try using a residue remover specifically designed for fabrics.
Apply a small amount of the residue remover to a clean cloth and dab it onto the affected area. Let it sit for a few minutes to allow the remover to work its magic.
After allowing the residue remover to penetrate the fabric, gently rub the area with a clean cloth or soft brush. Be careful not to scrub too vigorously, as this may damage the fabric.
Continue to work on the residue until it lifts off the fabric.
Once you have removed all traces of residue, wash the garment again following the care instructions.
Inspecting for any remaining residue and taking the necessary steps to eliminate it will ensure that your garment is clean and free from any leftover patch remnants.
Repeat if Needed
If you still notice any stubborn residue remaining on the fabric after the initial removal efforts, it may be necessary to repeat the process.
Sometimes, especially with older or well-adhered patches, one round of removal may not completely eliminate all traces of the patch.
Don’t worry, as repeating the removal process can help tackle any lingering residue effectively.
To begin, reapply heat to the patch using the same method as before. Place a clean cloth over the patch and use a warm iron to heat the area.
This heat will help loosen the adhesive, making it easier to lift off the remaining residue.
After heating the patch for a few minutes, attempt to peel it off gently. If the residue starts to come off, continue peeling until the fabric is clear.
If the residue persists, try using a residue remover or rubbing alcohol. Apply a small amount of the remover on a clean cloth and gently dab at the leftover residue.
Be cautious not to saturate the fabric, as excessive moisture can damage certain materials. Continue dabbing and lifting until the residue is completely removed.
Conclusion
So there you have it! Removing iron-on patches is a simple process that just requires a few tools and a little bit of patience. By following these steps, you can easily take off any unwanted patches from your clothing without causing damage. Remember to be gentle and take your time to ensure a clean finish. With these tips, you’ll have your garments looking good as new in no time!
Frequently Asked Questions
Can Iron-On Patches Be Reused After Removal?
Yes, iron-on patches can be reused after removal. Just follow the correct steps to detach them carefully. Once removed, you can iron them onto another fabric item. Reusing patches allows you to switch up styles easily.
Will Removing Iron-On Patches Damage the Fabric?
Removing iron-on patches may damage the fabric if done carelessly. Heat can cause burns or discoloration. Be cautious when peeling off the patch, use a fabric protector sheet, and follow instructions carefully to prevent harm.
How Do I Prevent the Patch From Sticking Again?
To prevent the patch from sticking again, avoid ironing over it directly. Use a pressing cloth between the iron and the patch. Additionally, consider sewing the edges of the patch for extra security against future adhesion.
Can I Use a Hairdryer Instead of an Iron?
Yes, you can use a hairdryer instead of an iron to remove iron-on patches. Apply heat from the hairdryer to soften the adhesive, then peel off the patch gently. Be cautious of the temperature to avoid damaging the fabric.
Are There Specific Fabrics That Are Harder to Remove Patches From?
Some fabrics, like denim or canvas, can be trickier to remove patches from as they are thicker and more durable. It may require more heat and patience to fully remove patches from these materials.


