How to Apply Large Iron Patches Without Wrinkles: The Overlooked Secret to Wrinkle-Free Iron Patches
Applying iron patches is not rocket science, but it’s also not as simple as tossing an iron on top and hoping for the best. What separates failure from flawless is recognising the wrong ways people usually follow and then flipping them into smarter, more effective habits.
So, let’s pull back the curtain. Here are the most common mistakes people make in patching, along with the right strategies that can change the whole game.
Fabric Isn’t Neutral (It’s Either Friend or Enemy)
I once slapped a patch onto this polyester gym bag. Looked great for about… fifteen seconds. Then the fabric puckered like a cheap balloon. And by the next day, the adhesive had half-melted into goo. Lesson learned: not all fabrics want to cooperate.
Cotton, denim? They’re your allies. They grip, they hold, they stay flat. Stretchy stuff? Satin, nylon? That’s betrayal waiting to happen.
The strange part is, people almost never check. They assume “iron-on” means any fabric. It doesn’t. It’s like trying to play vinyl on a Spotify playlist, it just doesn’t translate.
So: check the tag. If it says cotton, smile. If it says “delicate, cool wash only,” maybe rethink or reinforce with stitches. And here’s the kicker, you should iron the fabric flat before the patch even comes near it. Wrinkles under the patch become permanent scars. Twice the ironing, half the regret.
Heat Isn’t About Violence, It’s About Balance
Too hot, and you scorch. Too cold, and nothing sticks. Why’s this not common knowledge? Probably because irons don’t come with a “patch” setting. You’re left guessing, half scientist, half gambler.
I once went full blast on a hoodie patch because I thought more heat = better stick. The fabric didn’t wrinkle, it burned. A small brown halo around the patch like a bad sun tan.
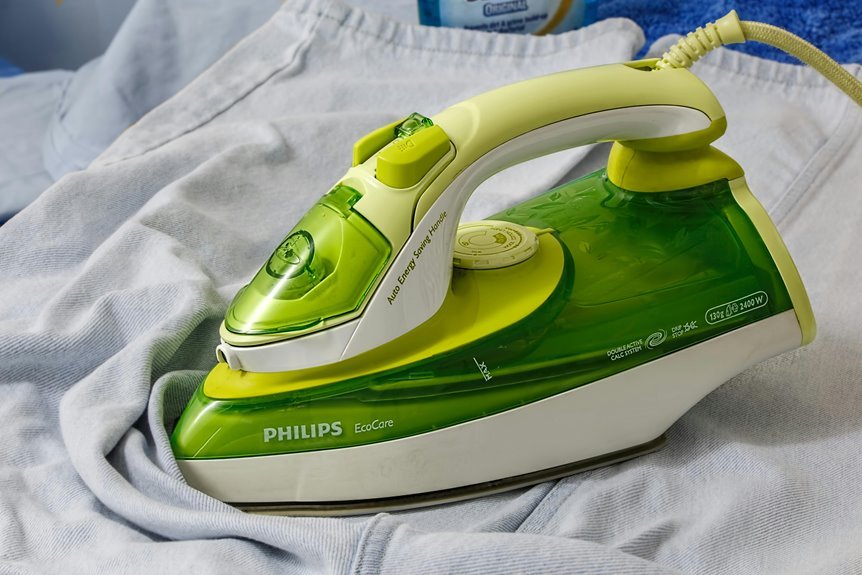
The secret is boringly moderate. Cotton setting, no steam. Firm pressure, but steady, not dragging. Dragging is where wrinkles sneak in, like creases in a badly folded bedsheet. Press, hold, breathe. 15–20 seconds. Lift. Repeat if stubborn.
It’s not about aggression. It’s about patience. Which, to be honest, most of us lack when we’re standing over an ironing board at midnight.
Edges Matter More Than Middles
Have you noticed that custom patches look perfect in the centre but start curling at the edges? That’s not bad luck. That’s physics, or laziness. Irons are flat, but fabric has seams, bumps, uneven boards. Pressure drops off near the edges, leaving them half-stuck.
It’s the equivalent of painting a wall beautifully in the middle but leaving the corners streaky. Everyone notices eventually.
So, use a hard, flat surface. Not the cushy ironing board with dents. A table works better. And after you iron, slap a heavy book on top while it cools. Even contact = no sneaky wrinkles.
The best patch I ever did? A band logo on my old backpack. Looked flawless because I pressed, cooled, and weighted it with a copy of War and Peace. Honestly, Tolstoy never worked harder.
Cooling—The Invisible Step We’re Too Impatient For
Nobody talks about cooling because it feels like dead time. We press, we admire, we want instant gratification. But here’s the truth: the glue is still molten when warm. Touch it too soon, and it shifts. Wrinkles appear. Sometimes hours later, like a cruel delayed joke.
The secret is restraint. Don’t touch. Don’t peel. Don’t even breathe too close. Let it set, at least 2–3 minutes. For extra insurance, keep that heavy book in place. (Yes, I’m advocating literature as a craft tool.)
Every time I’ve rushed, I’ve regretted it. Every time I’ve cooled properly, the patch lasted washes, runs in the rain, even the occasional tumble in a hostel laundry machine that probably broke EU regulations.
Reinforcement: The “Cheat Code” Nobody Uses
Iron-on patches promise no sewing. That’s the marketing. But if you’ve ever had one peel at the edges after a month, you know the ugly truth. Adhesive weakens. Fabric moves. Life happens.
So here’s the cheat: once cooled, stitch around the border. Doesn’t have to be fancy. A quick backstitch, some machine zigzag, whatever. Matching thread blends, contrasting thread makes it look deliberate.
I’ve got a denim jacket with a patch that’s survived festivals, rainstorms, and airport baggage handlers, all because I gave it that safety net of stitches. Honestly, it’s like adding Wi-Fi to a house that already has electricity: you could survive without, but why would you?
Funny thing about mistakes, they sneak up on you like a mosquito buzzing in your ear at 2 a.m. You think you’ve nailed it, you’re proud, and then bam, the patch looks like it’s trying to crawl off your hoodie. Wrinkles, weird bubbles, or worse, edges curling like stale bread. Embarrassing, honestly. And yet, people keep repeating the same errors because… well, everyone assumes patching is as simple as “iron + patch = done.” Spoiler: it’s not.
The truth (and I say this after ruining at least three shirts in college trying to slap on patches of my favourite bands) is that it’s less about being perfect, more about avoiding the rookie slip-ups. So, let’s get into it. Here are the wrong ways (and the right ones you probably should’ve been doing years ago).
Wrong Way: Tossing the Patch on Cold Fabric
Right Way: Preheat the Fabric—treat it like a skillet
Have you ever tried frying eggs in a cold? They just sit there, slimy, refusing to cook, and the whole thing feels off. Same with patches. Cold fabric is stiff, it pushes back, and the adhesive never really bonds. People don’t talk about this because they assume the iron itself is doing all the work. But nope.
A quick preheat, 10 to 15 seconds with the iron gliding over the surface, changes the whole vibe. The fibres loosen, the invisible creases vanish, and suddenly the patch isn’t fighting to sit flat. It’s like laying down a warm welcome mat.
I once skipped this step on a denim jacket and the patch peeled halfway off during the first bus ride in Karachi’s humidity (trust me, not a good look). Since then: always preheat.
Wrong Way: Sliding the Iron Around Like You’re Pressing a Shirt
Right Way: Steady Pressure, No Dancing
People get impatient. We’ve all been there, you think ironing on a patch is the same as ironing creases out of your trousers.
Here’s the deal: don’t slide. Just press. Firm, unmoving, almost like you’re sealing a wax stamp on an old letter. Hold it there for 20–30 seconds, then gently lift. Repeat if you must.
It feels boring, I know. It’s almost meditative though, waiting for the glue to melt and bond. And the payoff is glorious: flat, wrinkle-free, like the patch was born with the garment.
Wrong Way: Only Pressing the Top
Right Way: Heat Both Sides, Double the Bond
Most tutorials skip this. They’ll say “press the front” and leave it at that. But fabric is not just a surface, it’s a layered creature. Pressing the top melts the adhesive only halfway, and if the garment is thick (say denim, or a canvas tote bag), the patch ends up clinging like a half-hearted handshake.
Here’s the upgrade: flip the fabric over and iron the backside too. A few seconds, that’s all. Suddenly the adhesive isn’t just sitting there, it’s crawling into the fibres, embedding itself. The patch becomes part of the garment, not just taped on.
I did this once on a hoodie patch of my football club (Liverpool, for the record) and it lasted through months of aggressive washing. The difference is real.
Wrong Way: Pressing Without Protection
Right Way: Add a Barrier—cloth, parchment, something
Scorched polyester. Melted patch edges. That awful shiny mark that screams, “yes, I messed up.” This mistake is everywhere, and it happens because people underestimate how savage an iron can be.
Think of it like sunscreen. You wouldn’t sit in Dubai’s August heat without SPF, would you? Same principle. The patch looks fresher, the fabric isn’t ruined, and you can actually brag about your DIY skills without nervously covering the burns.
Wrong Way: Throwing It in the Wash Immediately
Right Way: Let the Patch Breathe and Cure
Here’s the most tragic mistake. You finally get the patch flat and smooth, perfect. And then, you toss the garment into the wash because hey, why not? Wrong. Adhesive is like wet cement. It needs time to settle, to cure, to become part of the fabric.
If you wash too soon (especially in hot water), it weakens the bond before it even starts. That’s why so many leather patches peel after one cycle. The smarter play is patience. Give it 24 hours minimum. Honestly, longer is better. The first wash? Hand wash gently if you can.
Yes, it’s annoying. Waiting always is. But I promise, your patch will thank you later. And you won’t feel like you wasted both time and money.
Wrapping This Mess (and Fixing It)
People think ironing patches is quick, like reheating pizza. But it’s more like making decent coffee, you can rush and end up with sludge, or take five extra minutes and enjoy something smooth.
So here’s my plea: stop treating the iron as a miracle machine. Respect the prep. Respect the cooling. Respect the edges. Wrinkles aren’t inevitable, they’re a consequence of cutting corners.
Next time you’ve got a patch in hand, pause. Ask yourself: am I just blasting this with heat and praying? Or am I setting it up for success?
Because, and here’s the blunt truth, a patch is more than decoration. It’s a story, maybe it’s your favourite band, a trip you survived, or just a silly impulse from an online store. It deserves better than wrinkles. And you deserve to wear it proud, flat, smooth, like it was always meant to be there.
So, iron smart. And maybe keep War and Peace nearby, just in case.
The wrong ways, they look harmless. Cold fabric, sliding the iron, skipping the backside, no protective cloth, washing too soon. Tiny shortcuts. But they pile up and leave you with wrinkled, peeling disasters.
The right ways, though, aren’t complicated. Preheat. Press steady. Double-side the heat. Use a barrier. And wait before washing. Simple tweaks. Game-changers.
And maybe here’s the bigger metaphor, half the time in life (patches, jobs, relationships even), it’s not about doing more. It’s about avoiding the traps. Avoiding the shortcuts that bite back later.
So next time you’re holding an iron and a patch in your hands, stop. Breathe. And that choice, as small as it seems, tells more about you than the patch ever could.


