How to Use Iron-On Patches for Customising Phone Cases & Tech Accessories: Fast-Forward Hacks
Let’s be blunt. Most people make things harder than they need to be. They get tangled in steps, rules, “best practices” written by someone who, if we’re honest, probably never even ironed a patch onto a phone case. And so what happens? Overthinking. Procrastination. Wasted evenings scrolling “DIY inspo” reels instead of actually making something. Minimising steps is not just a hack; it’s survival in a world where time feels like it’s shrinking (TikTok made three-minute videos feel long, remember?).
Now here’s the thing: speed doesn’t mean sloppy. It means smart. Cutting friction. Knowing what to skip and what to lean into. Think Formula One pit stops, two seconds, and the car is back on track. That’s the energy you need when customising phone cases or tech gear with iron-on patches.
Let’s tumble into the shortcuts. Not polished rules, but lived-in strategies.
Shortcut 1: Skip the Sewing (Seriously, Stop Fighting with Needles)
Here’s a confession: I once spent an entire Sunday trying to “secure” a patch with hand stitches. It looked like Frankenstein’s phone cover. Why? Because I thought iron-ons still needed stitching for durability. Old advice, outdated, but it lingers. People ignore the fact that heat-bond adhesives today are ridiculously stron, NASA-glue strong (okay, maybe not literally, but you get the drift).
How it works: use a heat press or even a flat iron (yes, the same one you used to burn your hair straight in 2010) with a steady press. Most adhesives melt clean, bond tight, and never let go. Saves hours. And guess what, no ugly thread lines.
The result: a sleek patch that looks like part of the case itself. Like it was born there. And you saved yourself the carpal tunnel.
Shortcut 2: Pre-Cut, Pre-Position, Don’t Wing It
Here’s where people lose days: re-placing custom iron patches, lifting them up, ironing again, adjusting, burning fingers, chaos. The overlooked fix? Pre-plan the design.
It sounds boring. Tedious even. But think of it like laying out chess pieces before the first move. I’ve seen Etsy sellers (the successful ones, the ones shipping 200 cases a week) who literally pre-cut templates of their favourite layouts. They know exactly where the patch sits before heat ever touches it.
Why it works: you eliminate hesitation. No back-and-forth, no “oops too far left.” You lay it down, iron once, done. Think of it as the IKEA effect in reverse, you’re not wasting time assembling because you already have the manual.
The result: symmetrical, professional-looking cases in under ten minutes. And people will ask, “Wait, did you buy that at Urban Outfitters?”
Shortcut 3: Leverage Mini Heat Tools (The Unsung Heroes)
We all picture irons as this giant appliance hogging space. But craft stores now sell pocket-sized heat presses, seriously, they look like toy toasters. Why is this overlooked? Maybe because people assume big jobs need big tools. Not true.
I tested this with a Cricut mini press. No exaggeration, it cut application time in half. Smaller surface, better control, less chance of melting plastic edges. Plus, it’s portable. I threw one in my backpack during a road trip and patched a phone case in a motel lobby while waiting for takeout. Ridiculous, yes. Effective? Absolutely.
The result: custom iron-on patches stick faster, cleaner, with fewer scorch marks. And the mobility adds a weird kind of joy, you can customise on the go, like street art but for tech.
Shortcut 4: Layered Patches = More Impact, Less Work
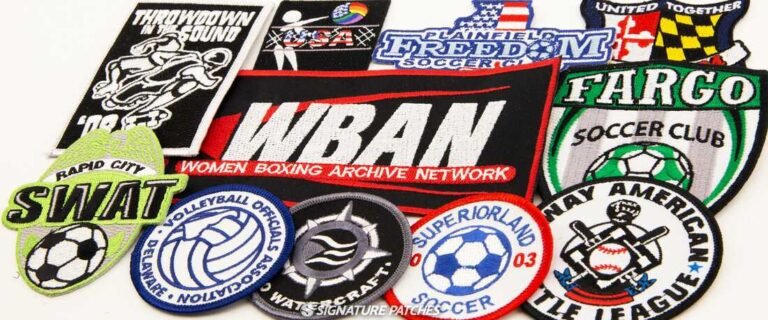
Here’s the cheat code almost no one talks about: stack custom patches. Instead of designing some overly complex embroidery or ordering a custom logo every time, just layer simple custom embroidered patches to tell a story. Like stickers but with texture.
Ignored? Because people think layers = complexity. But it’s the opposite. Two small custom iron patches, overlapped, create a design that looks curated. For example, I slapped a retro smiley over a denim-textured patch on a phone case. It looked like a $40 designer accessory. Reality? It cost less than a coffee.
Results: faster customisation without waiting for “special” custom patches to ship. A hack for the impatient, the restless, the entrepreneur who wants to test 20 designs before breakfast.
Shortcut 5: Batch, Don’t Solo
This one is sneaky but powerful. People customise one phone case at a time. Start to finish. Waste of rhythm. Instead, treat it like meal prep, batch iron-on sessions.
I watched a small Shopify seller do this during a live stream: she laid out 15 cases, pre-positioned every patch, then ironed them assembly-line style. What normally takes five hours, she finished in ninety minutes.
Why it works: momentum. You heat once, you focus once, you’re not mentally reloading every five minutes. Same principle as athletes training in reps instead of single sprints.
Result: higher output, consistent quality, and more time for Netflix. Or, if you’re more ambitious, scaling your business.
The Wrap-Up: Don’t Romanticise the Struggle
Here’s the mistake, too many makers equate complexity with value. They believe if something feels too easy, it must not be “real craftsmanship.” That mindset slows you down. The truth? Shortcuts are not cheats; they’re accelerators. They exist because someone smarter already solved the friction.
Iron-on patches for phone cases and tech accessories don’t need to be an odyssey. Use adhesives as intended, plan your placements, shrink your tools, layer for impact, and batch like a factory. These aren’t hacks to cut corners, they’re levers to pull you forward.
So here’s my call to action: stop dragging your feet. Pick one shortcut, just one, and test it this week. Iron while your coffee brews, design while your podcast plays. Prove to yourself how quick it can be. Once you see the speed, you’ll never go back. And maybe, just maybe, you’ll stop thinking of DIY as a slow craft and start seeing it as a fast lane.
