How to Layer Iron-On Patches for a Bold, Statement Look
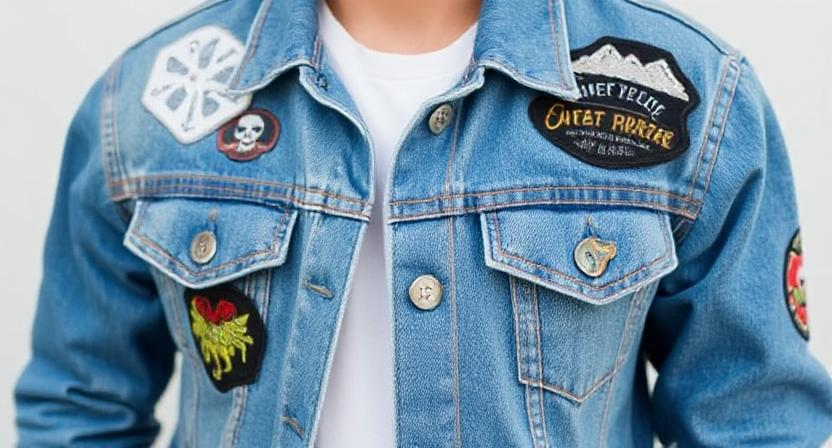
For a bold, statement-making style with iron-on patches, mastering the art of layering is key. Imagine the impact of combining multiple patches to create a cohesive yet eye-catching design on your favorite denim jacket or bag. Picture the intricate details and textures that can come together to showcase your unique personality and style. The process of layering iron-on patches is not just about adding decorations; it’s about crafting a visual story that speaks volumes without saying a word. Ready to elevate your fashion game with this creative technique?
“Shop Custom Iron Patches Now” – Click Here
Key Takeaways
- Choose contrasting colors for boldness.
- Mix sizes and shapes for visual interest.
- Use symmetrical or clustered placement.
- Layer strategically for a statement look.
- Experiment with embellishments for uniqueness.
Choosing the Right Iron-On Patches
When choosing the right iron-on patches, consider the design, size, and color scheme you want to incorporate into your garment.
Begin by envisioning the overall look you desire. Are you going for a fun and quirky vibe with playful cartoon patches, or a more sophisticated style with sleek monochromatic designs? Think about the size of the patches in relation to the garment. Larger patches can make a bold statement, while smaller ones offer a more subtle touch.
Next, consider the color scheme. Do you want your patches to blend in seamlessly with the fabric, or do you prefer a pop of contrasting colors? Take into account the base color of your garment to ensure the patches complement rather than clash with it.
Preparing Your Garment for Patching

To ensure successful application of your iron-on patches, the first step is to properly prepare your garment.
Before you start patching, it’s crucial to follow these steps:
- Wash and Dry: Clean your garment thoroughly to remove any dirt, oils, or residues that may prevent the patch from adhering properly.
- Iron Out Wrinkles: Smooth out any wrinkles on the area where you plan to place the patches. This ensures a flat surface for optimal adhesion.
- Choose a Stable Surface: Place a heat-resistant mat or towel on a hard, flat surface like a table or ironing board to provide a stable base for ironing.
- Avoid Steam: Make sure your iron is set to the dry, cotton setting without steam. Steam can interfere with the adhesive on the patches.
- Test Heat Sensitivity: If your garment is delicate or heat-sensitive, test a small inconspicuous area with a patch to ensure the fabric can withstand the heat.
Arranging Patch Placement
Once you have prepared your garment for patching, it’s essential to carefully consider the placement of your iron-on patches. Think about the overall look you want to achieve and the size and shape of each patch.
Start by laying your garment flat on a clean surface. Consider the focal points of the garment, such as the back or chest area, and visualize how the patches will look once attached.
One popular placement option is the symmetric approach, where patches are evenly placed on both sides of the garment to create balance. You can also opt for a clustered look by grouping patches together in a specific area for a more concentrated effect.
Another fun idea is to mix and match different sizes and shapes of patches for a unique and eclectic style. Experiment with the placement by moving the patches around until you find a layout that you love.
Remember to leave some space between patches to avoid overcrowding and ensure that each patch stands out. Once you’re satisfied with the arrangement, you can move on to the next step of ironing on the base patch.
Ironing on the Base Patch
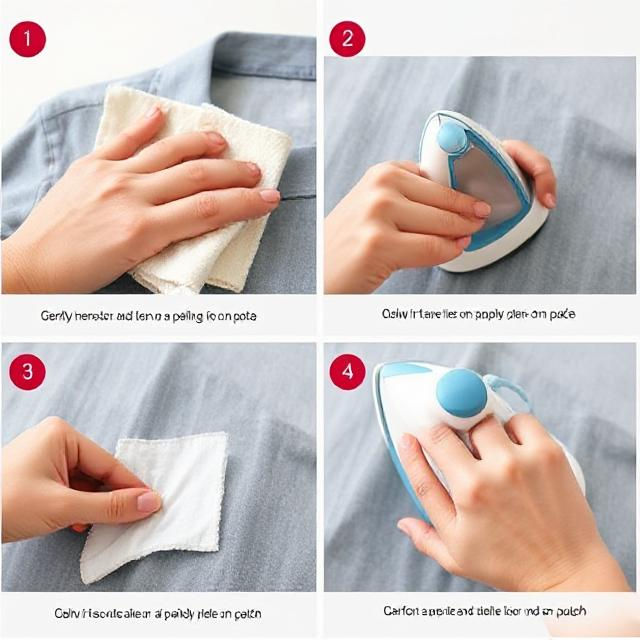
Before ironing on the base patch, ensure that your iron is set to the appropriate heat setting recommended for the type of fabric you’re working with.
To successfully adhere the base patch, follow these key steps:
- Prepare the Fabric: Make sure the fabric is clean and wrinkle-free before ironing on the base patch.
- Position the Patch: Carefully place the base patch on the desired spot on the fabric, ensuring it’s centered and aligned correctly.
- Protect with a Pressing Cloth: Place a thin pressing cloth over the patch to prevent direct contact between the iron and the patch, protecting both the patch and the fabric.
- Apply Even Pressure: Press the iron firmly and evenly on top of the patch, moving it in a back-and-forth motion for about 10-15 seconds.
- Allow to Cool: Let the fabric cool down for a few minutes before checking if the patch has adhered properly.
Layering Additional Patches
When layering additional patches onto your fabric, remember to consider the placement and design composition carefully. Think about how the new patches will interact with the base patch and each other. You want the patches to complement one another and create a cohesive look.
One approach is to mix different sizes and shapes to add visual interest. For example, try placing a smaller patch on top of a larger one for contrast. Experiment with arranging the patches in various positions before ironing them on to find the most pleasing layout.
Consider the colors of the patches as well. You can create a striking effect by layering patches with complementary or contrasting colors. This can make the design pop and draw attention to your unique style.
Remember that less is sometimes more. Avoid overcrowding your fabric with too many patches, as this can make the design look cluttered. Choose a few key patches to layer strategically for a bold, statement look.
Securing Layers With Heat
To secure multiple layers of iron-on patches onto your fabric, you’ll need to apply heat evenly across the entire surface. This process ensures that the patches adhere firmly and create a seamless look. Here are some key steps to effectively secure layers with heat:
- Preheat Your Iron: Before applying heat to the patches, make sure your iron is preheated to the correct temperature setting recommended for the type of patches you’re using.
- Use a Pressing Cloth: Place a pressing cloth over the patches before ironing to protect the fabric and patches from direct heat exposure, preventing any damage.
- Apply Even Pressure: Press down firmly on the iron while moving it in a circular motion over the patches to ensure that heat is evenly distributed across all layers.
- Check for Adhesion: After ironing, allow the fabric to cool slightly before carefully peeling off the backing of each patch to check for proper adhesion.
- Reapply Heat if Needed: If any edges or corners of the patches aren’t fully adhered, reapply heat using the same technique until they’re securely bonded to the fabric.
Adding Embellishments and Details
For a touch of personalization and flair, consider adding embellishments and details to your layered iron-on patches. You can elevate the look of your patches by incorporating additional elements such as sequins, beads, or embroidery. These embellishments can help make your patches stand out and reflect your unique style.
Here is a table showcasing some ideas for adding embellishments and details to your iron-on patches:
| Embellishment Type | Description | Example |
|---|---|---|
| Sequins | Small, shiny decorative elements | Shiny sequins |
| Beads | Small decorative objects for texture | Colorful beads |
| Embroidery | Intricate thread designs for detail | Floral embroidery |
Experiment with these different options to create a one-of-a-kind design that truly represents your personality. Remember to carefully attach these embellishments to ensure they stay secure on your patches for a long-lasting finish.
Finishing Touches and Care Instructions
To complete your iron-on patches and ensure their longevity, it’s essential to focus on the finishing touches and care instructions. Taking care of your patches properly will maintain their vibrant appearance and durability.
Here are some key tips to help you maintain your iron-on patches:
- Avoid Harsh Washing: Gentle washing by hand or using a delicate cycle on the washing machine can prevent the patches from coming loose.
- Turn Garments Inside Out: Turning your clothing inside out before washing can protect the patches from friction and damage during the washing process.
- Use a Pressing Cloth: When ironing over patches, place a thin pressing cloth over them to prevent direct heat exposure, which can cause the patches to melt or lose their adhesion.
- Store Garments Carefully: Store your clothing with iron-on patches in a cool, dry place away from direct sunlight to prevent fading and adhesive deterioration.
- Avoid Dry Cleaning: Dry cleaning can be harsh on iron-on patches, so it’s best to stick to gentle washing methods at home.
Styling Tips for a Statement Look
When it comes to creating a standout look with iron-on patches, incorporating styling tips can elevate your outfit to make a bold statement. To achieve a fashion-forward appearance, consider mixing and matching patches of different sizes and designs on a single garment. This layering technique adds depth and visual interest to your outfit, making it truly unique.
Additionally, placing patches strategically on areas like the sleeves, pockets, or back of a jacket can draw attention to these areas and create a focal point in your ensemble. Experiment with asymmetrical placements or create a symmetrical pattern for a balanced look.
Don’t be afraid to mix iron-on patches with other embellishments like pins, studs, or embroidery to further enhance your style. This combination of textures and details can add complexity to your outfit and showcase your personality.
When styling your patched garment, consider pairing it with simple, neutral pieces to allow the patches to stand out. Remember, the key to a statement look is to have fun and express yourself confidently through your fashion choices.
Conclusion
Now that you’ve layered your iron-on patches for a bold, statement look, rock your personalized garment with confidence! Remember to follow care instructions to maintain the patches’ quality and durability. Experiment with different combinations and placements to create unique designs that reflect your style. Embrace the creative process and have fun expressing yourself through your fashion choices. Get ready to turn heads and showcase your individuality with your eye-catching patched-up outfit!
Frequently Asked Questions
Can Iron-On Patches Be Layered on Any Type of Fabric?
Yes, iron-on patches can generally be layered on most fabric types. However, it’s essential to consider the fabric’s thickness and texture to ensure proper adhesion. Always follow the patch manufacturer’s instructions for optimal results and durability.
How Do I Prevent Patches From Peeling off After Washing?
To prevent patches from peeling off after washing, ensure a secure bond by applying enough heat and pressure during the ironing process. Cover patches with a thin cloth before ironing and double-check the edges for adhesion.
Can I Iron Patches Onto Stretchy or Delicate Fabrics?
Yes, you can iron patches onto stretchy or delicate fabrics. Be cautious with heat settings and duration to prevent damage. Always test on a small inconspicuous area first. Use a pressing cloth for added protection.
Should I Apply a Protective Layer Over the Patches?
You should apply a protective layer over the patches to ensure they withstand wear and tear. It’s a smart way to preserve your design and keep it looking fresh. Don’t skip this step for long-lasting results.
How Can I Remove Iron-On Patches if I Change My Mind?
If you change your mind about iron-on patches, carefully peel them off by gently lifting the edges with a fingernail. Apply heat from an iron to soften the adhesive if needed. Clean any residue with rubbing alcohol.


